Why Getting a Professional New Roof Inspection Saves You Thousands
Why a New Roof Inspection Can Save You Thousands
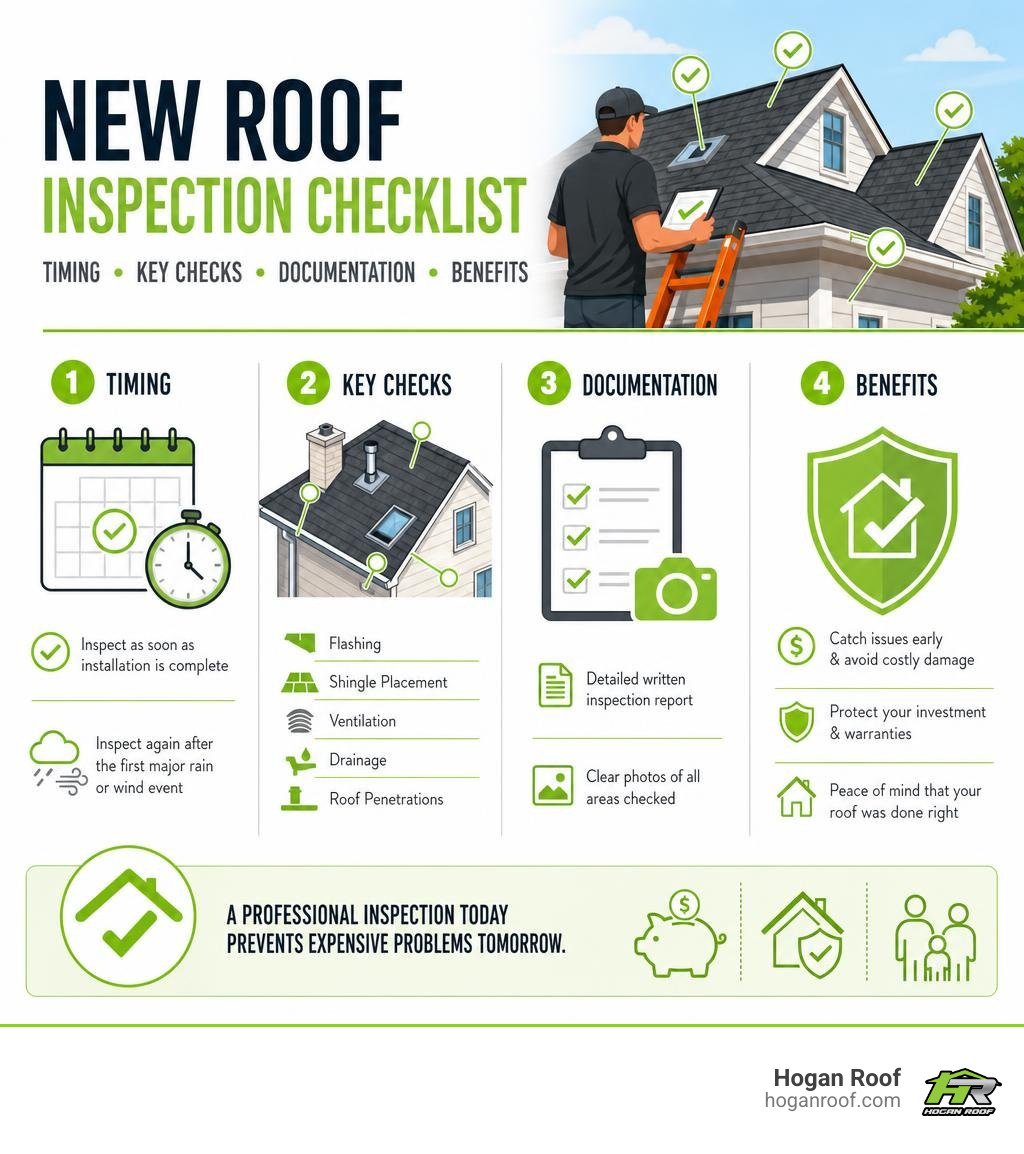
Schedule a professional new roof inspection as soon as the installation is complete, ideally before final payment, then again after the first major rain or wind event. An independent, detailed check can find installation errors in flashing, shingle placement, ventilation, drainage, and roof penetrations before they become leaks, mold, damaged decking, or disputed warranty claims.
A new roof is a major investment, but it is not automatically a problem-free one. Professional inspectors find at least one minor defect on many roofs, and improper installation accounts for a meaningful share of roofing problems. Flashing deserves special attention: it is one of the most common weak points and can allow water into the home even when the shingles look perfect from the ground.
For homeowners and small-business owners in NY, NJ, and CT, the goal is simple: get written proof that the roofing system was installed correctly, meets applicable requirements, and drains and ventilates as it should.
I am Bill Hogan, owner of Hogan Roof, with more than 20 years of experience serving residential and commercial roofing clients across the tri-state area. I have seen how a timely new roof inspection can catch small workmanship issues before they turn into expensive repairs.
Know your new roof inspection terms:
Why a Professional New Roof Inspection Is Critical
Replacing a roof is one of the most significant financial commitments you will make as a property owner. When the dumpsters roll away and the crew packs up their ladders, it is natural to breathe a sigh of relief. The surface looks pristine, the color matches your siding, and the neighborhood curb appeal just jumped ten points. However, assuming that a fresh installation guarantees zero defects is one of the most expensive assumptions a homeowner can make.
Industry data reveals that 29% of roof issues detected by professional roof inspectors are caused by improperly installed roofs. When you consider that nearly 60% of homeowners who completed a roof replacement reported their project was an urgent repair or emergency, it is easy to understand how hurried timelines can lead to oversight.
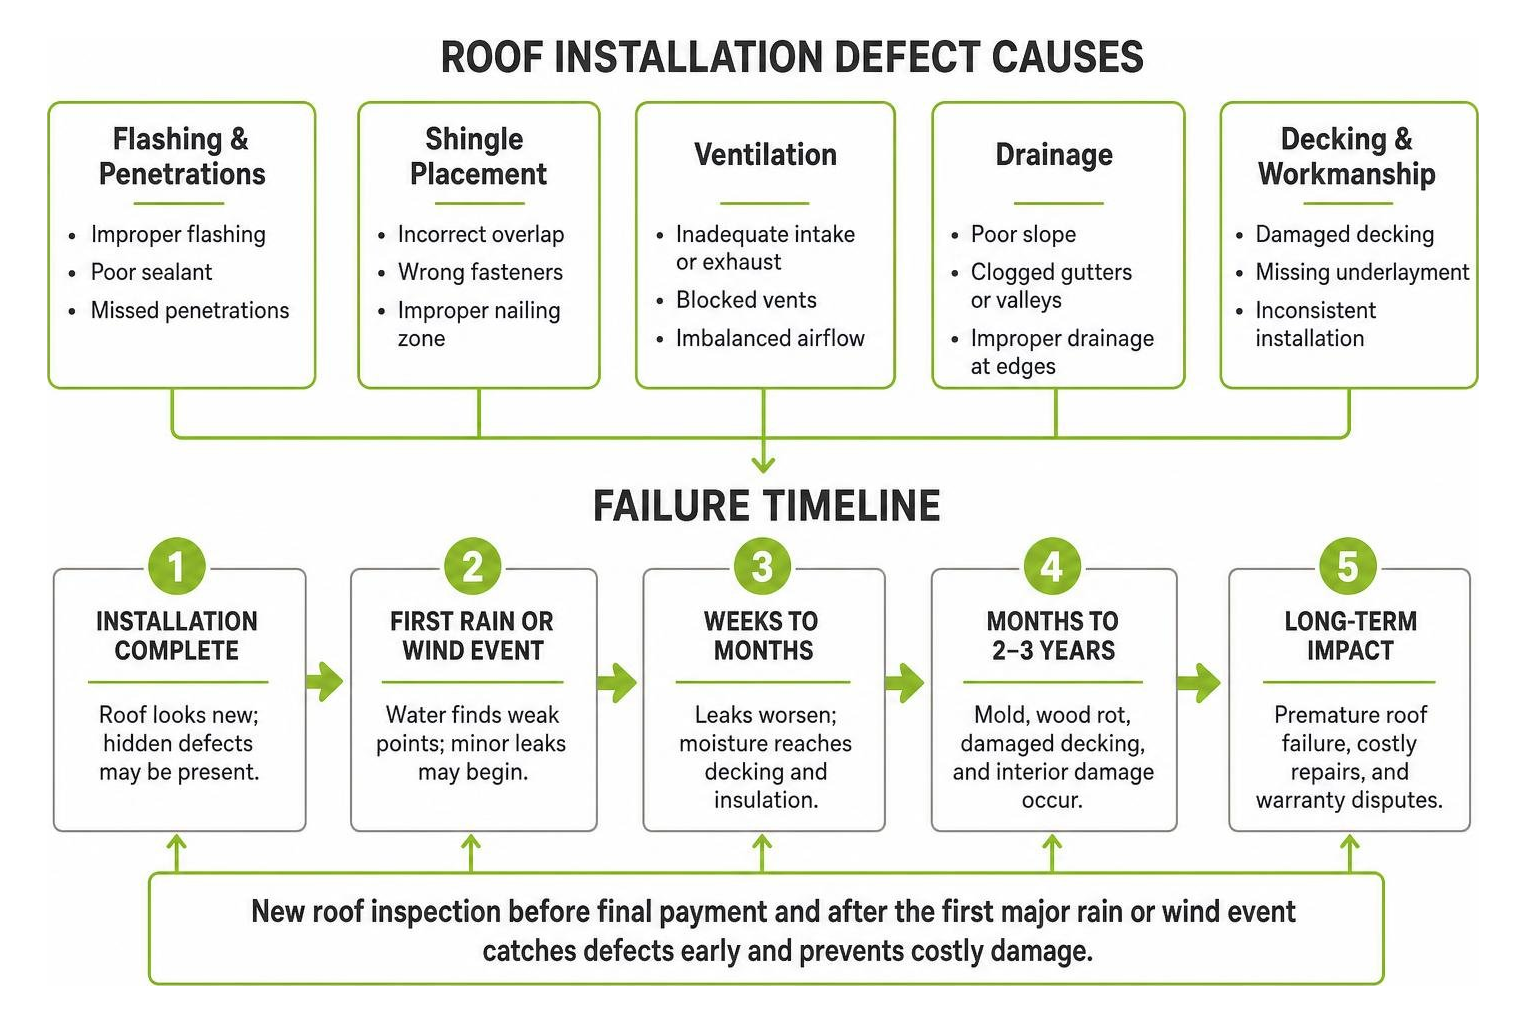
A comprehensive assessment confirms structural integrity, adheres to local building codes across New York, New Jersey, and Connecticut, and stops early water intrusion in its tracks. Investing in quality residential roofing systems means ensuring every layer—from the wood decking up to the ridge cap—performs in harmony. Without an independent review, hidden installation mistakes can quietly turn into wood rot, ruined attic insulation, and premature roof failure within two to three years.
The Hidden Risk of Installation Defects
Even well-meaning crews can make subtle mistakes that compromise the entire building envelope. A full 68% of professional roof inspections uncover at least one small defect. While a single misplaced fastener might sound negligible, modern asphalt shingles rely on precise wind-nailing strips to deliver their rated wind resistance.
Improper nailing patterns are among the most frequent installation flaws:
- Over-driven nails: Fasteners shot with high pneumatic pressure punch straight through the shingle mat, leaving the shingle loose and vulnerable to high winds.
- Under-driven nails: Nails left sticking up rub against the underside of the overlapping shingle, eventually wearing holes through the material.
- Incorrect nail types or placement: Failing to use code-compliant ring shank nails during deck re-nailing or missing the manufacturer's designated nail line voids wind warranties instantly.
Flashing errors present an even larger threat. Statistics show that almost 24.3% of tested residential roofs have flashing problems that could potentially cause leaks. Whether a crew rushed through the tear-off quality check, reused deteriorated step flashing around a chimney, or failed to properly seal valley transitions, flashing vulnerabilities allow water to slip unseen behind walls long before dripping through a ceiling.
Protecting Manufacturer Warranties and Insurance Coverage
Your roofing system is protected by two distinct safeguards: the contractor's workmanship warranty and the material manufacturer's warranty. However, major manufacturers like Owens Corning enforce strict installation instructions. If shingles fail because of incorrect nailing, inadequate attic ventilation, or substandard underlayment, the manufacturer can—and routinely will—deny your warranty claim.
The financial stakes are massive when you consider that approximately 30% of insurance claims are due to leaking roofs and water intrusion. When you file a claim for storm or water damage, insurance adjusters look closely for evidence of pre-existing installation defects or deferred maintenance. If the carrier determines your leak resulted from improper contractor installation rather than storm damage, they may reject the claim entirely.
A thorough post-installation inspection provides documented proof that your roof meets all manufacturer specifications and local building codes, preserving your warranty coverage and giving you ironclad leverage if a future claim arises.
What Happens During a Thorough Roof Evaluation
A complete roof assessment is a forensic, multi-point engineering review of your building's exterior and interior protection systems. It goes far beyond simply walking the roof line and peering over the gutters.
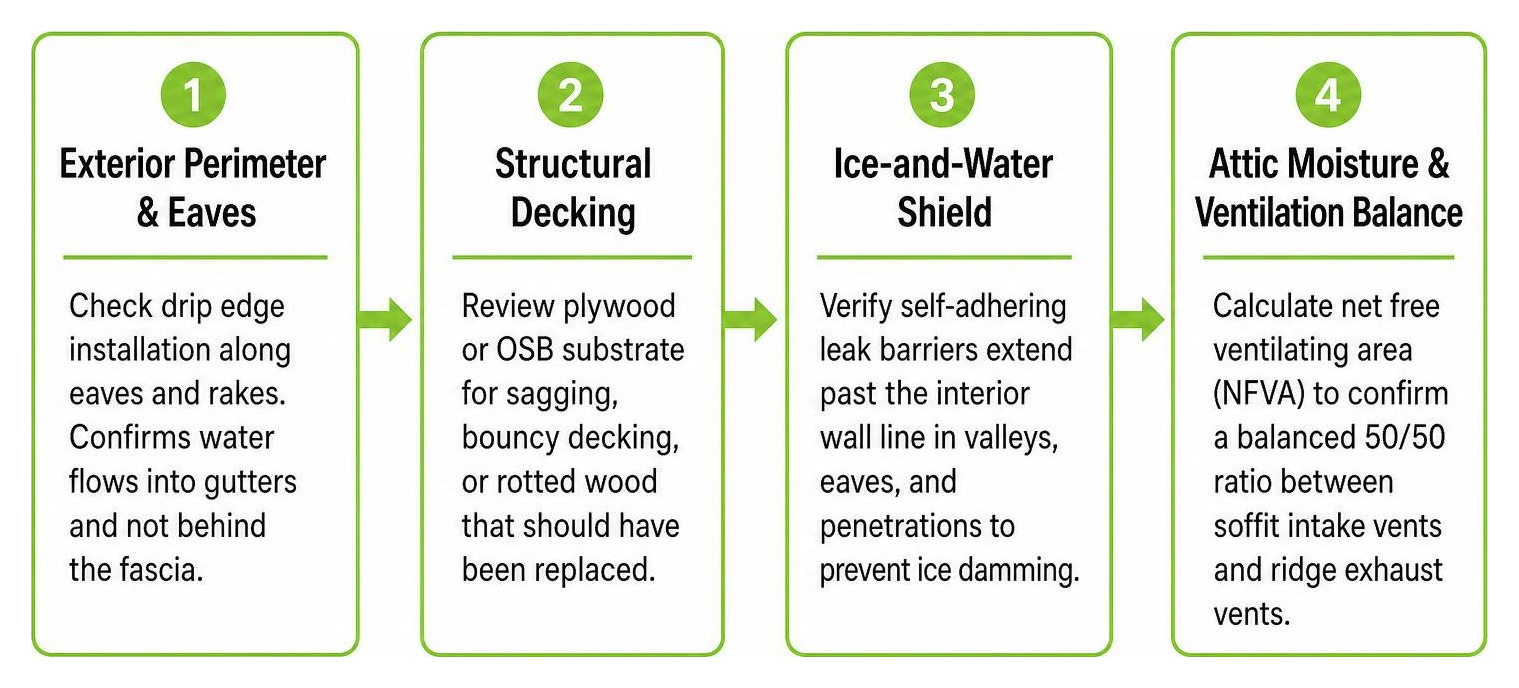
When our certified inspectors evaluate a new roof, we examine every component that contributes to long-term weatherproofing:
- Exterior Perimeter & Eaves: We check the installation of the drip edge along eaves and rakes, confirming it directs water cleanly into gutters without getting behind the fascia board.
- Structural Decking: We review the underlying plywood or OSB substrate for sagging, bouncy decking, or rotted wood that should have been replaced during the initial tear-off.
- Ice-and-Water Shield: We verify that self-adhering leak barriers extend past the interior wall line in vulnerable valleys, eaves, and penetrations to prevent winter ice damming.
- Attic Moisture & Ventilation Balance: We calculate the net free ventilating area (NFVA) to confirm a balanced 50/50 ratio between continuous soffit intake vents and ridge exhaust vents.
- Gutter Slope & Drainage: We inspect downspout connections and gutter pitch to ensure high volumes of runoff travel safely away from your home's foundation.
Key Components Checked During a New Roof Inspection
To verify a complete installation, inspectors utilize a detailed checklist aligned with standards from the National Roofing Contractors Association to confirm no shortcuts were taken on critical roof transitions:
- Step Flashing & Counter-Flashing: Every roof-to-wall intersection, dormer, and chimney requires individual step flashing pieces woven between shingle courses, protected by cut-in masonry counter-flashing rather than surface-applied caulk.
- Ridge Vents and Cap Shingles: Inspectors confirm that the roof decking was cut back accurately along the ridge to allow hot air exhaust, and that ridge cap shingles are fastened with extra-long nails to resist uplift.
- Drip Edges: Metal drip edge must overlap the underlayment properly at the eaves and sit over the underlayment at the rakes to prevent wind-driven rain from soaking wood decking.
- Shingle Alignment & Exposure: Shingle courses must follow straight, uniform horizontal lines with accurate exposure according to manufacturer specifications to ensure proper water shedding and aesthetic symmetry.
- Pipe Boots and Roof Penetrations: Plumbing vent pipes, electrical masts, and HVAC vents need properly seated rubber boots or metal collars, with the top flanges tucked beneath the shingles and lower flanges overlapping them.
- Soffit Intake Airflow: Inspectors verify that insulation baffles inside the attic remain clear so soffit intake vents are not choked off by fiberglass or blown-in cellulose.
Advanced Diagnostic Tools and Drone Technology
Modern roof inspections have evolved well beyond visual assessments from a ladder. Today, certified inspectors combine years of field experience with state-of-the-art diagnostic technology to find defects that remain completely invisible to the naked eye.
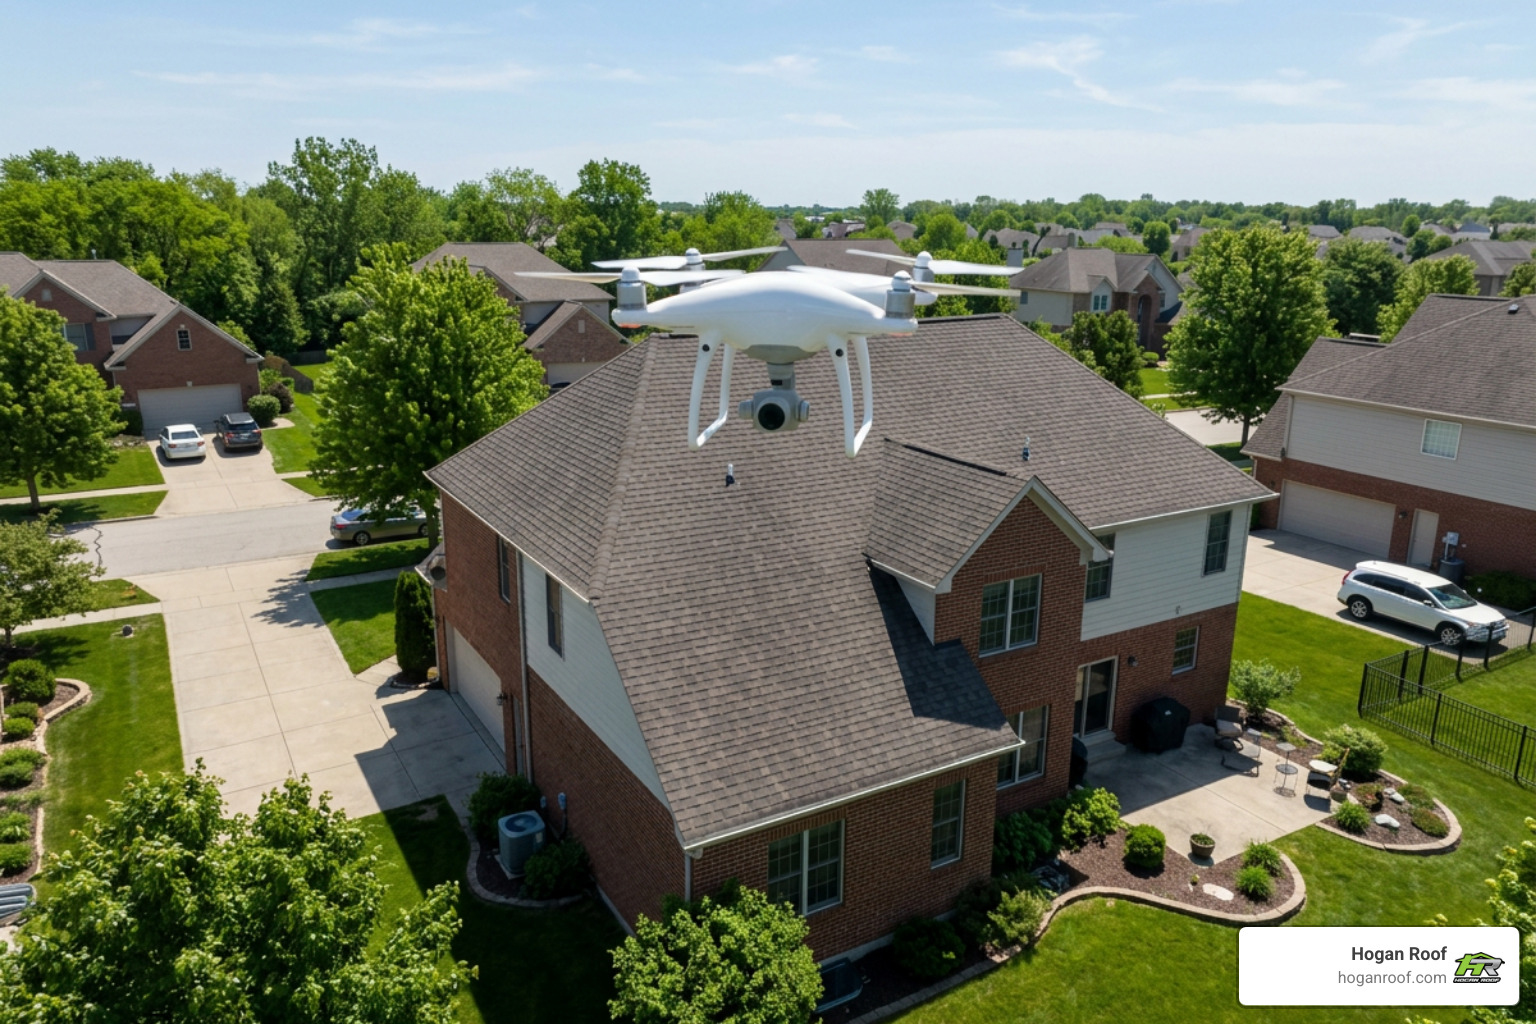
Using high-resolution aerial imaging allows inspectors to capture ultra-high-definition photographs of steep, fragile, or multi-story structures without risking foot damage to fresh, soft asphalt shingles on warm days. You can explore how how roof inspection with drones saves time and money by delivering safe, millimetric visual analysis of complex roof geometries.
In addition to aerial drone passes, inspectors employ:
- Infrared Thermography: Thermal imaging cameras detect subtle temperature differentials across roof decks and ceilings, identifying trapped moisture in underlayment or missing attic insulation.
- Digital Moisture Meters: Calibrated pin and pinless moisture meters verify baseline dryness levels across rafters, structural framing, and sheathing.
- HAAG Forensic Standards: Utilizing proven tactile testing protocols, inspectors evaluate shingle bond adhesion and mechanical resistance without causing physical damage to newly installed materials.
Dedicated Roof Inspection vs. Standard Home Inspection
Many property owners wonder whether the general home inspection completed during a property purchase is sufficient, or if a dedicated evaluation is truly necessary. It is crucial to understand what buyers and owners must know about a dedicated roof inspection after purchase. More than 85% of homes are sold with unaddressed roof damage or leaks, making specialized analysis essential.
A standard home inspector must evaluate an entire property—from electrical panels and plumbing lines to HVAC systems and foundations—within a two-to-three-hour window. As a result, they may only spend 10 to 15 minutes observing the roof from the ground with binoculars or peeking over the gutter line from a ladder.
In contrast, a dedicated roof inspection is a forensic, 60-to-90-minute evaluation focused purely on the building envelope. The result is a formal Roof Condition Report complete with annotated high-resolution photographs, code compliance assessments, thermal moisture logs, and clear repair recommendations.
| Inspection Factor | Dedicated Roof Inspection | Standard Home Inspection |
|---|---|---|
| Primary Focus | Total roofing system, flashing, ventilation, & structure | General overview of all home operating systems |
| Roof Time Allocated | 60 to 90 minutes dedicated purely to roofing components | 10 to 15 minutes average visual assessment |
| Inspection Methodology | Physical roof walk, drone aerials, attic thermal imaging | Ground-level binocular review or ladder-edge view |
| Diagnostic Equipment | Thermal cameras, moisture meters, drone imaging | Basic camera, standard flashlight |
| Deliverable | Formal Roof Condition Report & warranty compliance check | General multi-system summary report |
| Ventilation Analysis | Mathematical intake vs. exhaust calculation (NFVA) | Basic visual note of attic vent presence |
When to Schedule Your Post-Installation Assessment
Timing your inspection correctly ensures that any necessary corrections are addressed before they cause interior disruption or legal friction with your contractor. The number one cause of roof issues is inadequate or deferred roof maintenance, and setting up an initial baseline inspection establishes the foundation for your roof's lifelong health.
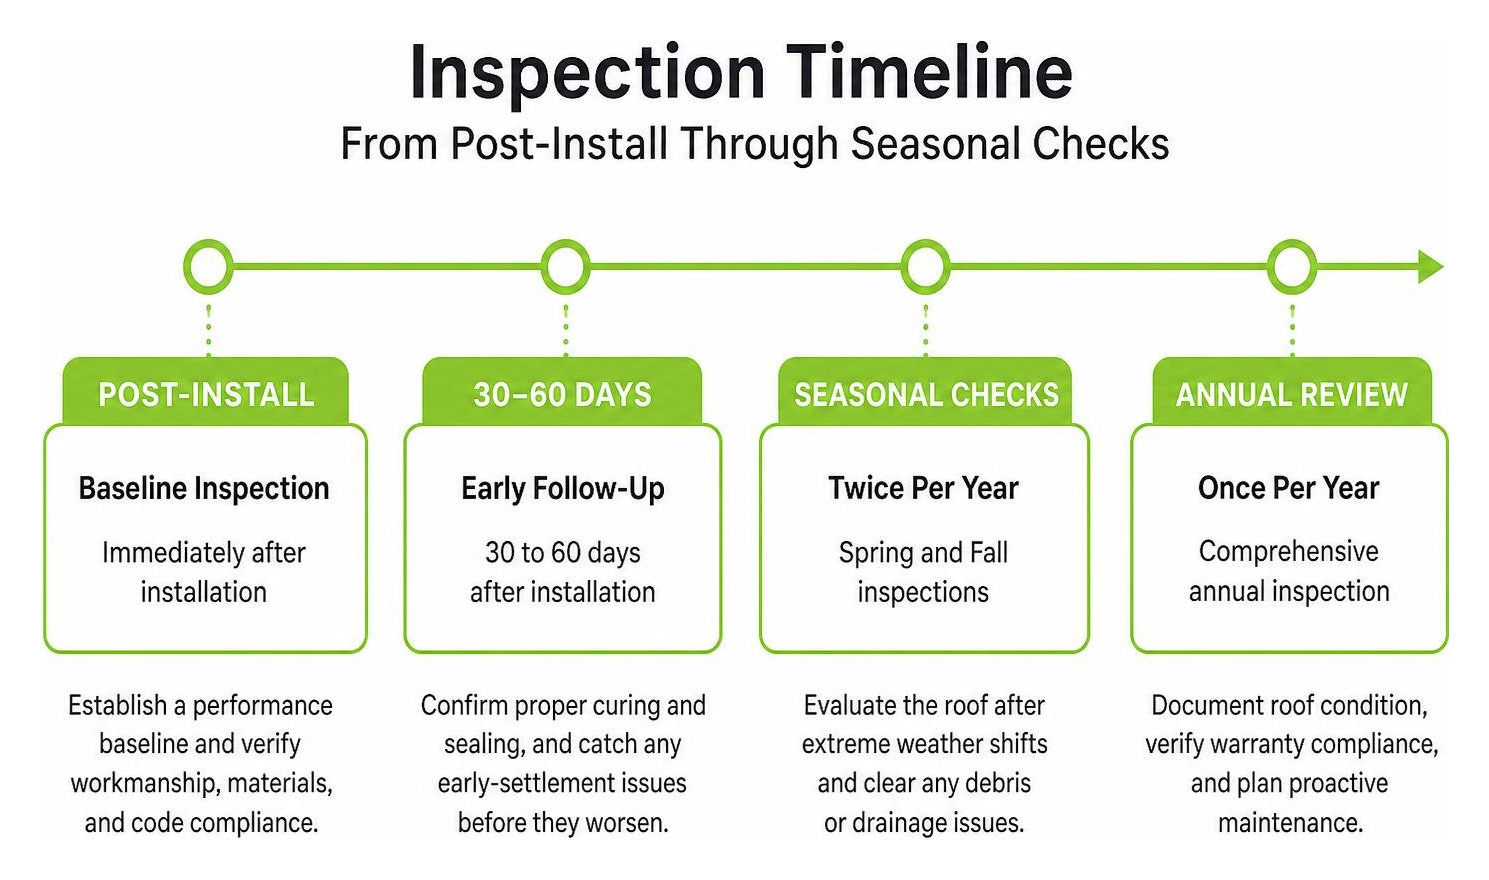
Ongoing roof maintenance begins the moment the final nail is driven. Scheduling an inspection at key project milestones protects your investment across every stage of ownership.
The Timeline for a New Roof Inspection
To maximize your financial and operational protection, adhere to this strategic inspection schedule:
- Immediately Post-Installation (Before Final Payment): Schedule your primary independent inspection within 48 to 72 hours of project completion. Holding your final payment milestone until the inspection report confirms code and manufacturer compliance provides the ultimate leverage to ensure contractors promptly correct any defects.
- Within the 5 to 14-Day Real Estate Contingency Window: If you are purchasing a home with a freshly installed roof, schedule a dedicated roof inspection during your contractual contingency period to negotiate seller repairs, closing credits, or escrow holdbacks before closing.
- Following the First Major Weather Event: Inspect the attic and exterior after the first severe rainstorm, high-wind event, or winter freeze to verify that flashings, ice-and-water shields, and drainage channels perform flawlessly under real-world hydrostatic pressure.
- Annual Preventative Verification: Plan a yearly follow-up inspection to clear debris, verify sealant integrity around flashings, and ensure your ventilation system continues functioning optimally season after season.
What Homeowners Can Spot Before Calling a Professional
While climbing onto a steep roof should always be left to insured professionals, homeowners can easily spot red flags from the ground using a pair of binoculars and a watchful eye inside the home.
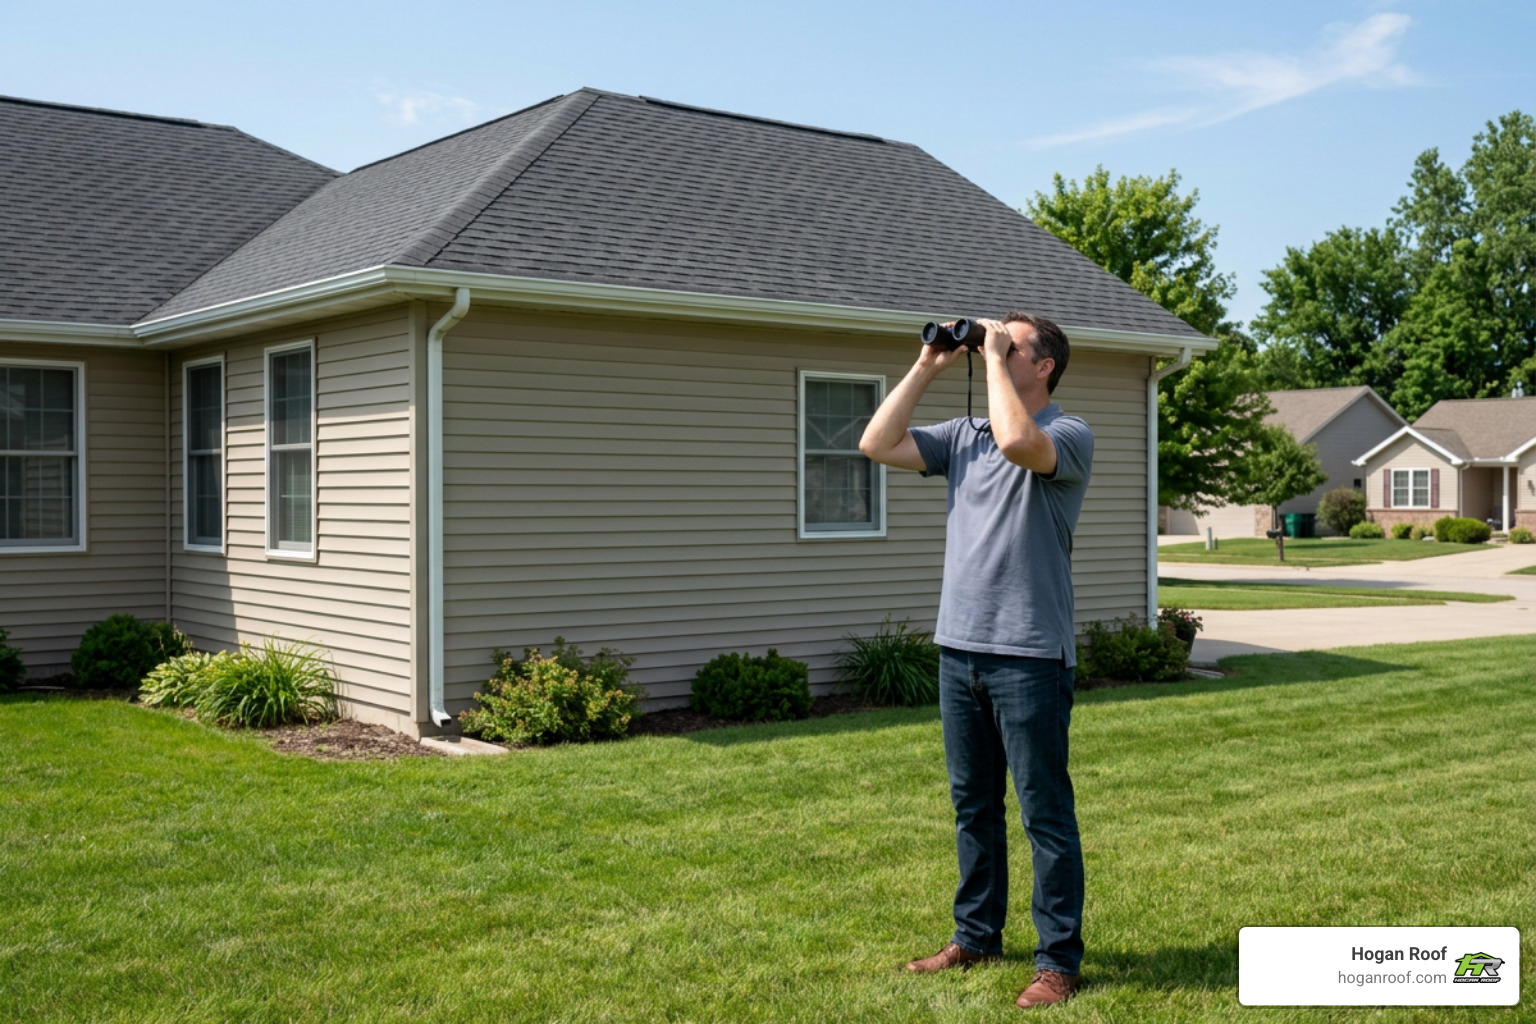
Take a walk around your property perimeter and check your interior living spaces for these common warning signs:
- Crooked or Wavy Shingle Courses: Shingles should run in straight, parallel horizontal courses. Wavy lines often indicate improper alignment, uneven underlayment, or sagging roof decking underneath.
- Exposed Underlayment or Nails: You should never see exposed nail heads on the face of field shingles or strips of synthetic underlayment poking out from beneath edge lines.
- Mismatched Shingle Bundles: Check for sudden variations in color shading across roof planes, which happens when shingles from different manufacturer production lots are mixed during installation.
- Gutter Debris and Slope Issues: Look for excessive granule accumulation inside clean gutters, hanging fasteners, or standing water that indicates improper gutter slope.
- Stray Nails and Debris Around Landscaping: Careless crews often leave roofing nails, old shingle scrapings, and discarded packaging in shrubs and driveways.
- Interior Water Stains and Damp Insulation: Head up into your attic on a bright sunny day to look for daylight peeking through unsealed gaps, and check after a rainstorm for dark water stains, damp insulation, or musty odors along rafters.
Frequently Asked Questions About Roof Inspections
How much does a professional roof inspection typically cost?
The average professional roof inspection costs approximately $331, with most residential inspections ranging between $125 and $571 nationwide. The final price depends on the overall square footage of the roof, the steepness of the pitch, the number of stories, the complexity of architectural dormers and valleys, and whether advanced diagnostic tools such as thermal imaging or drone surveys are required.
To better understand standard service rates, explore our transparent pricing breakdown. Considering that repairing neglected flashing leaks or rotted structural decking can easily cost upwards of $5,000 to $8,000 in interior remediation, a professional inspection delivers immediate return on investment.
Will skipping an inspection void my roofing manufacturer warranty?
Skipping an independent inspection does not automatically cancel your warranty on day one, but it leaves you completely unprotected if installation defects cause a failure later. Roofing manufacturers enforce strict installation manuals. If a windstorm blows off shingles and the manufacturer's field representative discovers the installer used four nails instead of the required six-nail high-wind pattern—or missed the nail line entirely—the manufacturer will immediately deny your warranty claim. An inspection verifies that your installation strictly follows all certified manufacturer standards.
How long does a thorough roof inspection take?
A thorough, professional roof inspection typically takes between 60 and 90 minutes for an average-sized residential property. For large, complex architectural layouts, steep historic properties, or commercial structures requiring extensive attic evaluations and drone imaging passes, an inspection can take up to three or four hours. The inspector will walk the roof deck, thoroughly survey the interior attic space for moisture and ventilation balance, and compile an exhaustive photographic report detailing their findings.
Conclusion
Your roof represents the primary shield safeguarding your family, your possessions, and the structural integrity of your home against the elements. Installing a new roof is a major milestone, but true peace of mind comes only with verified craftsmanship.
By identifying subtle installation mistakes, confirming code compliance, and securing full manufacturer warranty protection, a timely post-installation inspection saves you thousands of dollars in premature repairs and stressful insurance disputes.
At Hogan Roof, our team brings over two decades of dedicated expertise as an Owens Corning Platinum Preferred Contractor serving residential and commercial properties throughout New York, New Jersey, and Connecticut. Whether you need a comprehensive post-installation evaluation, preventative maintenance, or expert repairs, explore our complete services today or schedule a free inspection to ensure your roofing investment stands strong for decades to come.